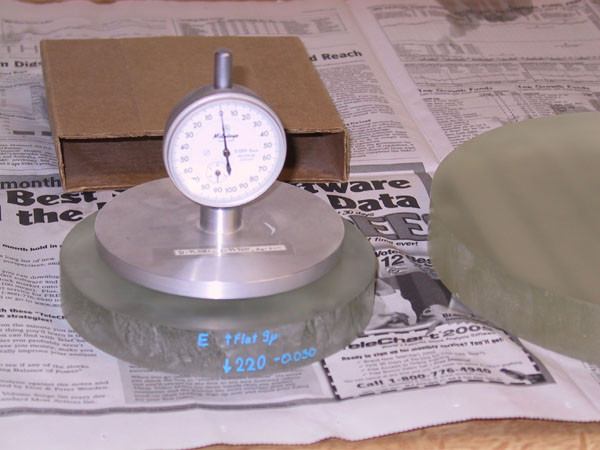
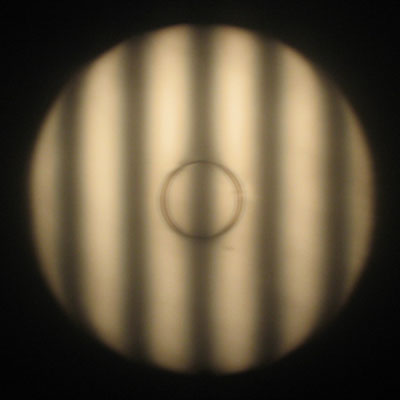
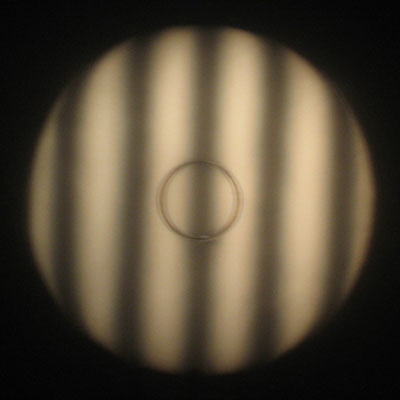
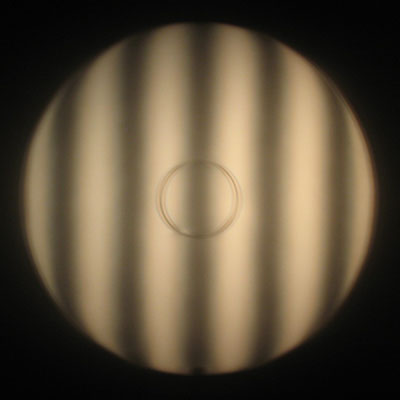
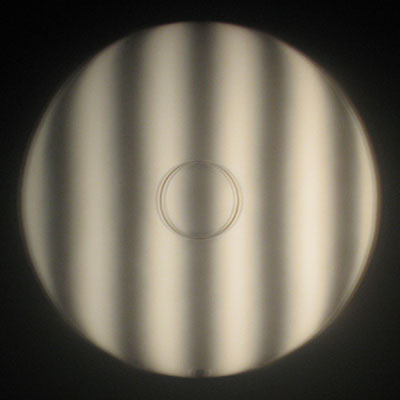
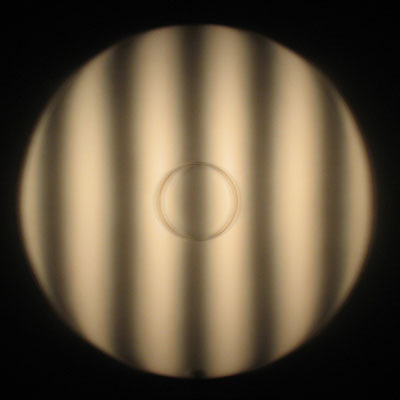
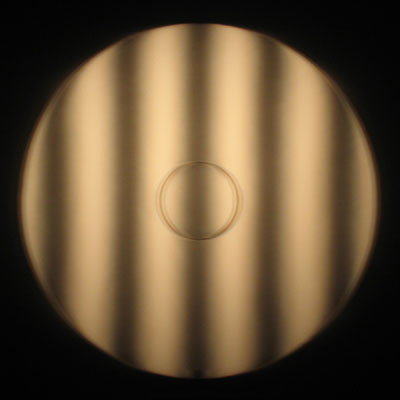
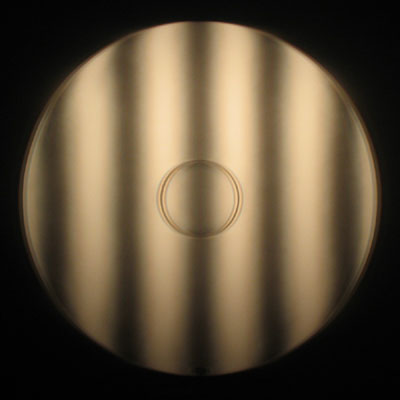
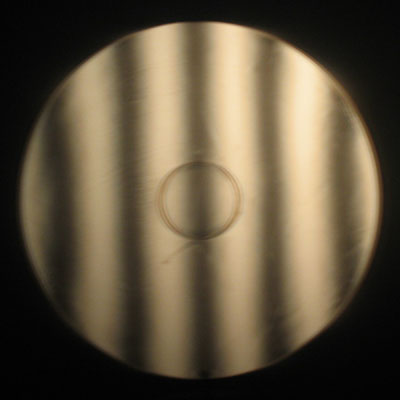
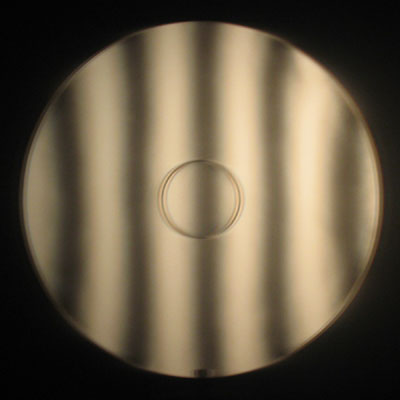
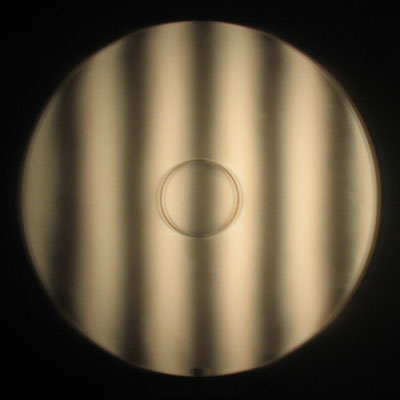
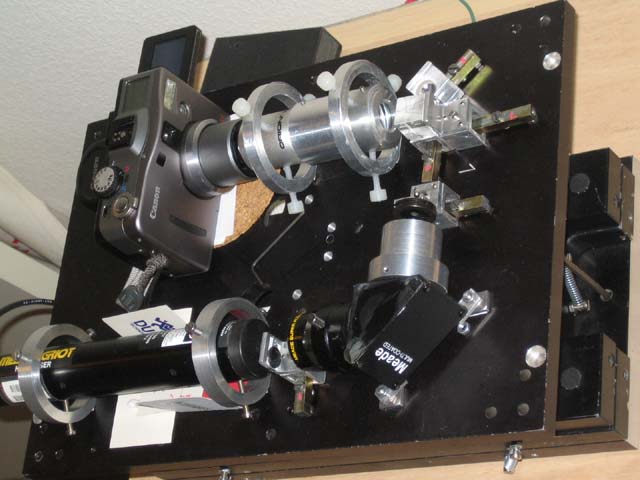
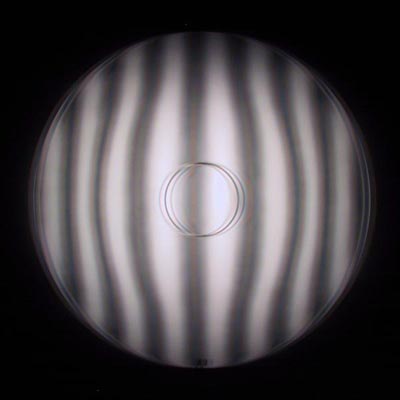
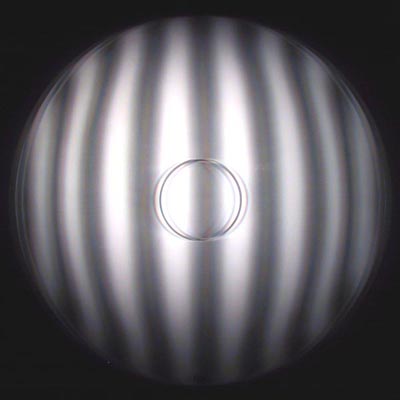
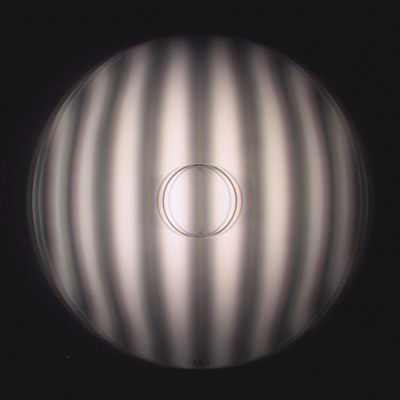
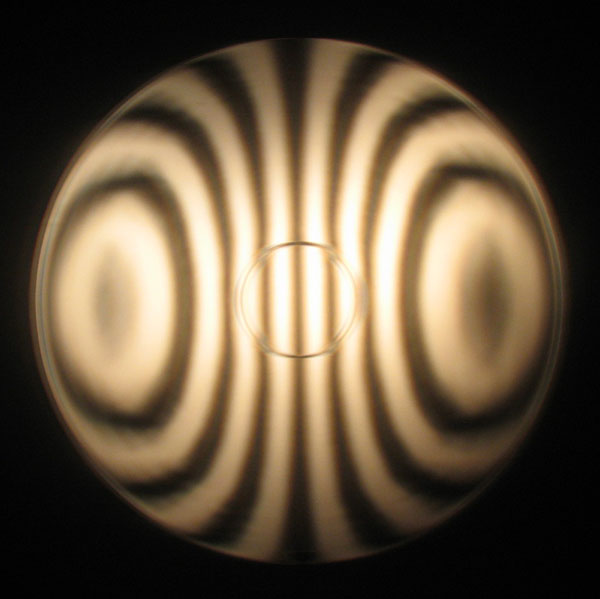
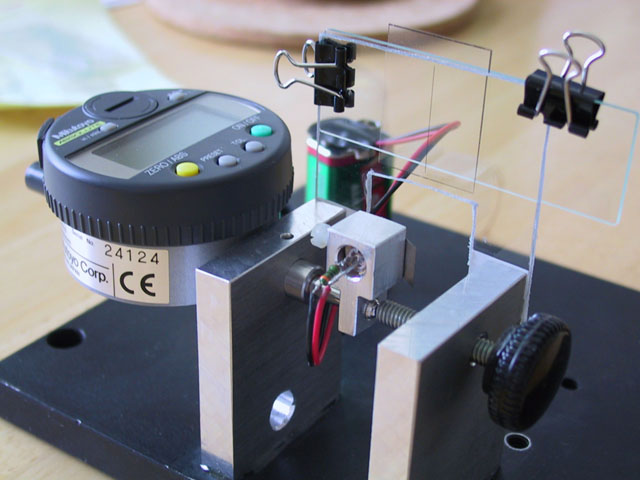
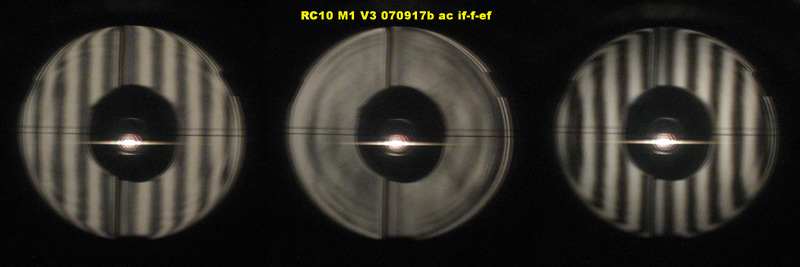
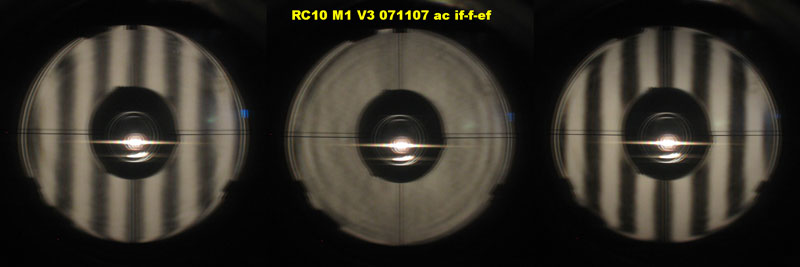
Here at first the pretty bad interferograms of the system in autocollimation and a picture of the test setup
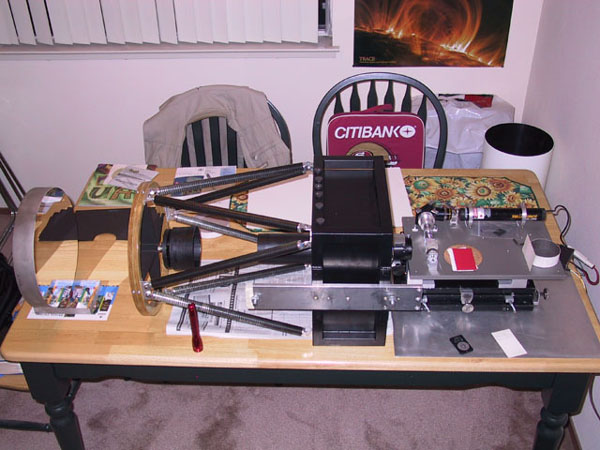
Remember, the interferogram is in autocollimation. Eyeballing the lines one would estimate that the wave front is off by about 2 fringes. So that would be 1 fringe of error in single pass or 1/2 wave of surface error. This is not acceptable.
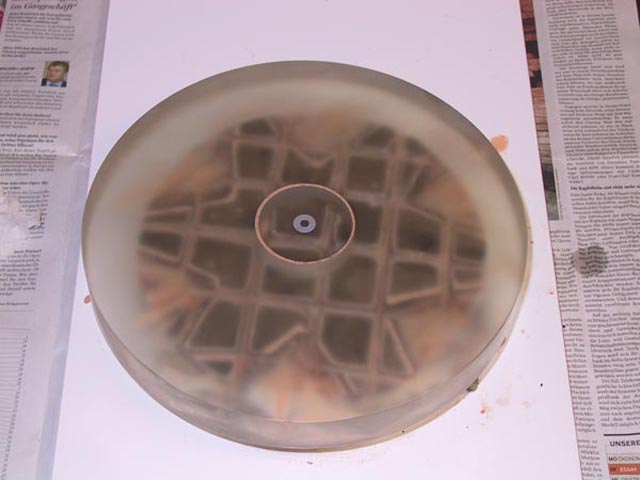
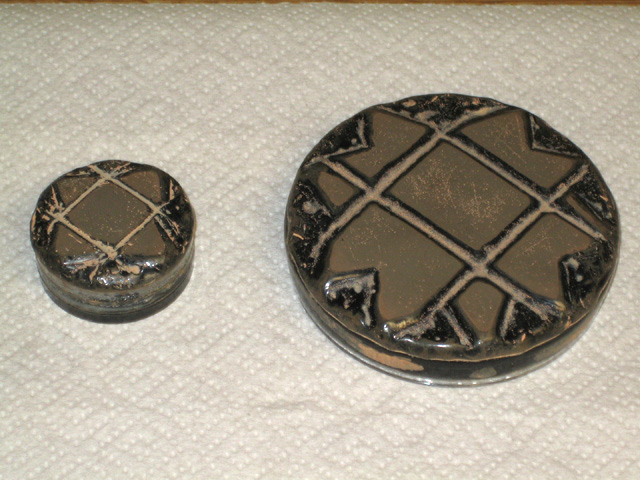
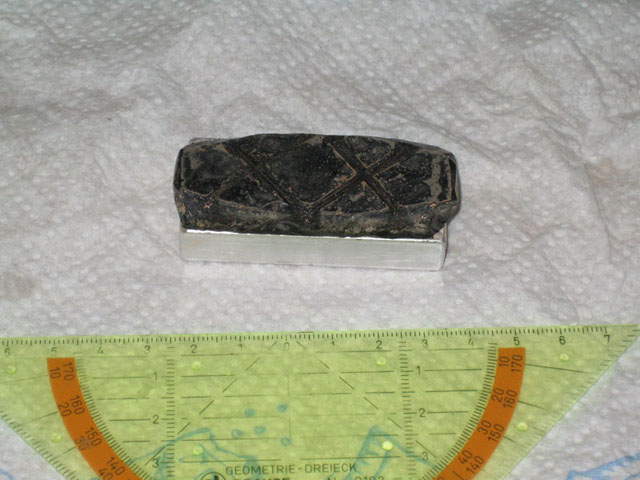
Here the new blank and a tool that a friend from the mirror making class had prepared. The mirror is already cored for the Cassegrain. The core is put back into the hole with plaster. The plaster is sealed with bees wax. The radius was already diamond generated, so I could start grinding at 220grit. The surface was in good contact after less than 1hr.
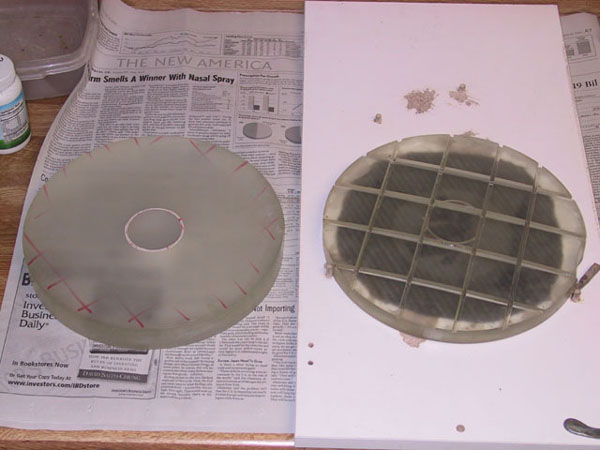
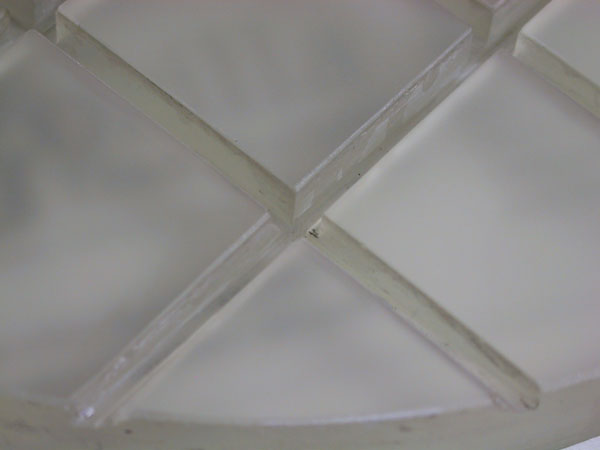
The grooves in the tool were diamond generated, too. I used a SiC-stone to remove the sharp edges.
The radius measurements were done with my 1micron spherometer for which I had once made a reference surface out of a 6inch pyrex disk.
Grinding went through the usual steps. Grit 220, 400, 600, 9um, 5um.
Then I poured a pitch lap and started polishing
 |
2005-09-21
First 2 polishing sessions after 2.5hrs MOT. Surface shiny to about 10mm from the edge. Pretty spherical. R=1322mm (target for R1_edge=1322.8mm) |
 |
2005-09-22
1hr polish 1/4 stroke very skinny W, MOT. Shine a bit better. Edge starts to flatten! |
 |
2005-09-24
1hr polish 1/4 stroke, MOT. Shine not much better. There are artifacts at the coring groove. resealed the grove with melted bees wax. |
 |
2005-10-01
1/2hr polish 1/5 stroke, TOT. 1/2hr MOT very short strokes. Shine much better near edge. Turning edge getting worse. Shaving the pitch lap and repressing. |
 |
2005-10-01
1hr polish very short strokes, MOT. Artifacts near coring groove much improved. Seems no improvement on the turning edge. What will help this edge?? I can't do much shorter strokes! |
 |
2005-10-02
1hr polish very short strokes (~2cm) MOT. Perhaps the edge is getting better? Almost not discernible. |
 |
2005-10-05
1hr polish very short strokes (~2cm) MOT. Edge very slow improvement. Not yet polished out. Edge about 50% polish. Try TOT with short strokes? |
 |
2005-10-09
1hr polish very short strokes (~2cm) TOT. Edge noticeable improvement. Polish better towards the edge. more like this! |
 |
2005-10-10
1hr polish short strokes 1/4 TOT. Nice improvement on edge. Polish 90% center to 3cm, 70% 3cm to 0.5cm, 60% to edge. Holding tool sides. |
 |
2005-10-17
1hr polish short strokes 1/4 TOT. Narrow 'W'. Holding tool sides. Edge almost perfect. Polish difficult to see due to residue on glass. |
 |
2005-10-20
1hr polish short strokes 1/4 TOT. Narrow 'W'. Holding tool sides. Edge perfect. Maybe even slightly raised in extra focal Ronchi. Polish 90% center to 1cm, 70% to edge. More TOT with stronger 'W' to bring edge back. |
 |
2005-10-23
30min. TOT with long stroke & wider 'W'. Bad idea. Edge is down. Back to short strokes. |
 |
2005-10-30
1hr TOT 1/4stroke small 'W'. Edge back to normal. Polish all even 90%. Extreme edge 1mm at 100%. Turn now to MOT to smooth surface zones. |
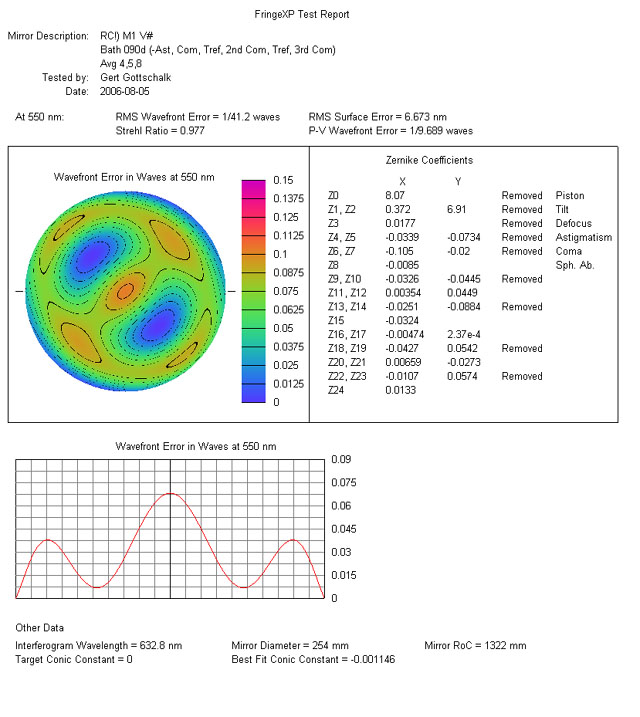
I did some more polishing with the goal to make the mirror as spherical as possible. The idea was mostly academic. I wanted to see how good it can be done and also use it to debug my interferometer projects. In the end I ended up at 1/40L wavefront RMS of which I am not sure how much are artifacts from the Bath-type interferometer or the actual mirror. I am subtracting quite a few aberrations from the interferogram analysis using fringeXP. The reasoning is that some artifacts seem to rotate with the mirror when I turn it in the test stand and others don't. So I attribute those to the interferometer. The there are some which rotate partially and I haven't jet figured out how to deal with those.
This is how my Bath-interferometer now looks like. It's development deserves an extra web page which I will write up some day.
 |
2006-08-09
2 x 30min MOT 1/3length with 1" W. The star tool does not work! All I get is a sphere in the center. No way to get correction with this. |
 |
2006-08-13
30min. MOT on full size (10") lap. Parabolizing stroke 'W' with extra center-over-center stroke in the middle. The damage is almost corrected. The center could go deeper and the correction needs to be pushed out to the edge. Much more is needed. |
 |
2006-09-03
1hr MOT on full size lap. Strong parabolizing stroke. This is about as far as it went with a full size tool. |
At this point I did have to switch to sub diameter TOT polishing. I
used 4" and 2" tools with no pressure.
The tools were cut to a star shape.
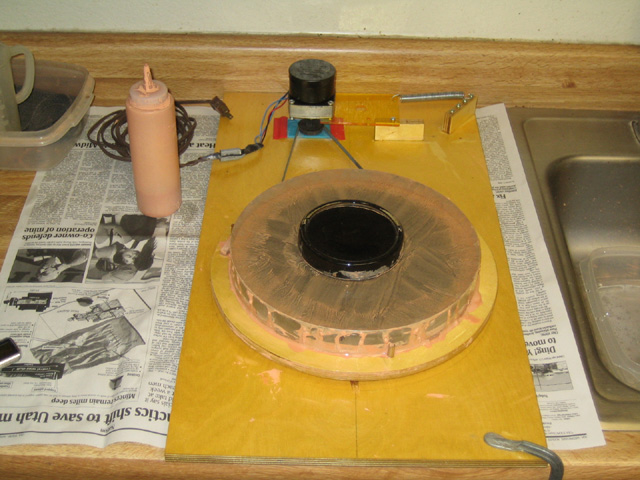
For polishing I used the turntable which has worked very well s far.
The table has about 6rpm.
That is nice an slow and allows good control over the polishing process.
The 4" starlap TOT was doing a very nice job in continuously deepening the curve in the center and giving a good even correction. Only drawback is that this is a slow process. 1hr of polish with no extra pressure gives about 5% more CC. So it is easy to compute that the required 117% would take about will take about 22hrs of work.
After 21hrs of combined polish mostly with the 4" but sometime with the 2" lap the mirror had the proper amount of correction.
Ronchi (100lpi) inside RoC
Outside RoC
The shape looks good with some polishing artifact near the edge which was difficult to bring to the proper correction. A lot of work with the small polisher was done here.
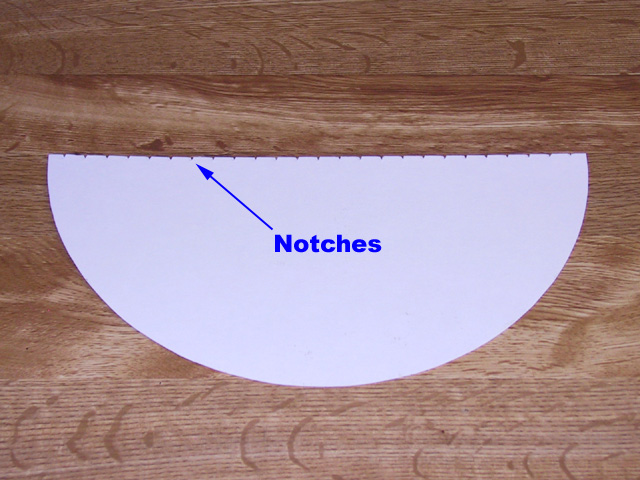
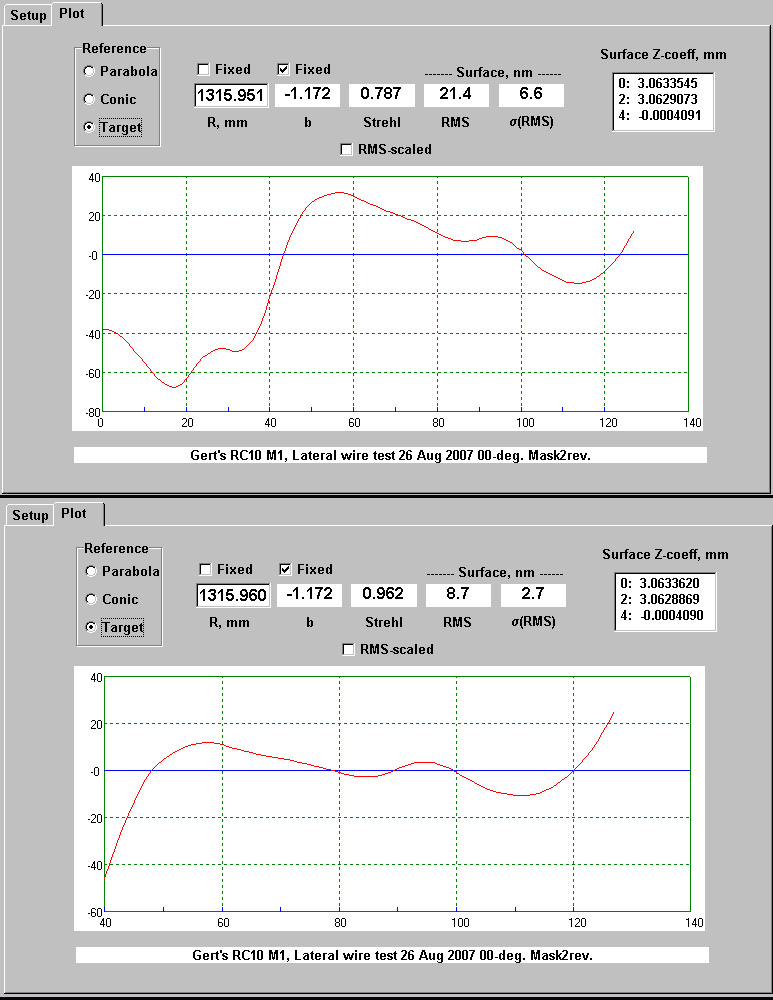
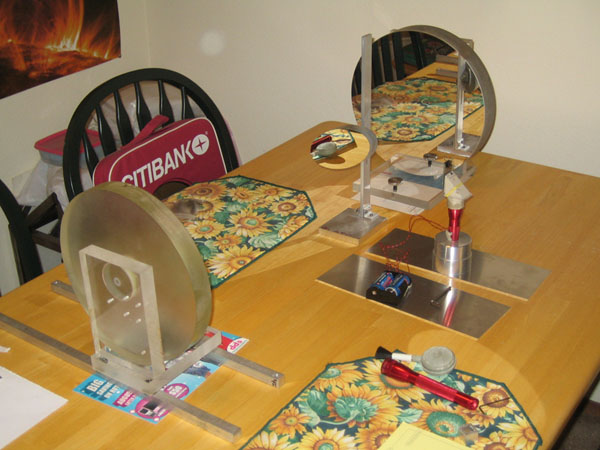
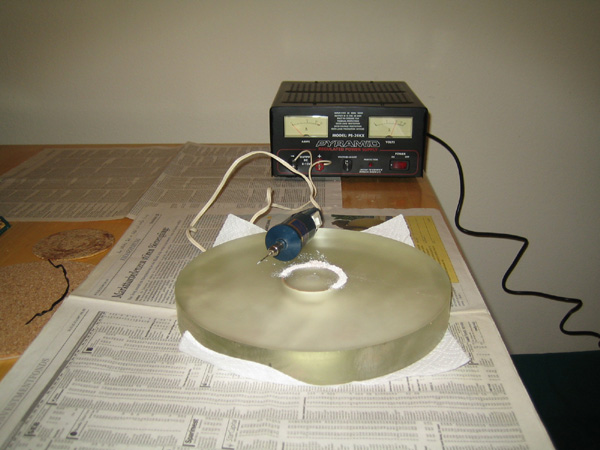
For numerical testing I went back to my lateral wire tester (LWT). It works well and I found good correlation with interferometric tests.
Here a picture of the tester.
I found a good ruler for determining the position of the wire shadow. A piece of cardboard showing 1/2 of the mirror with little notches cut at very regular intervals. The notches make nice bright diffraction spots are and very point like. It is very easy to position the wire shadow on these marks.
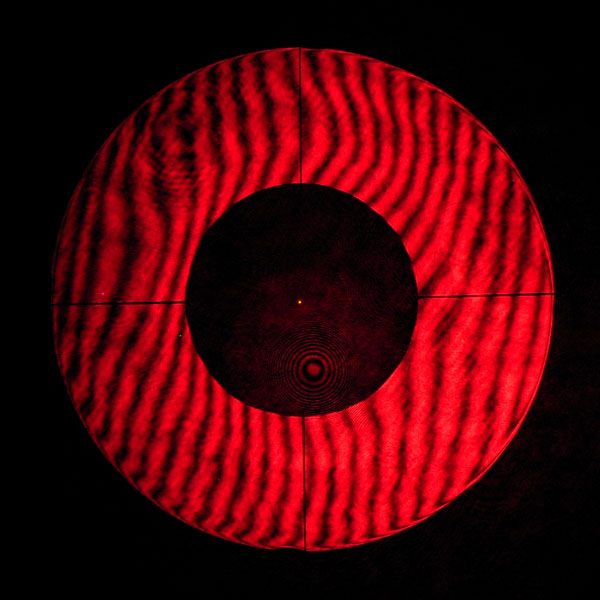
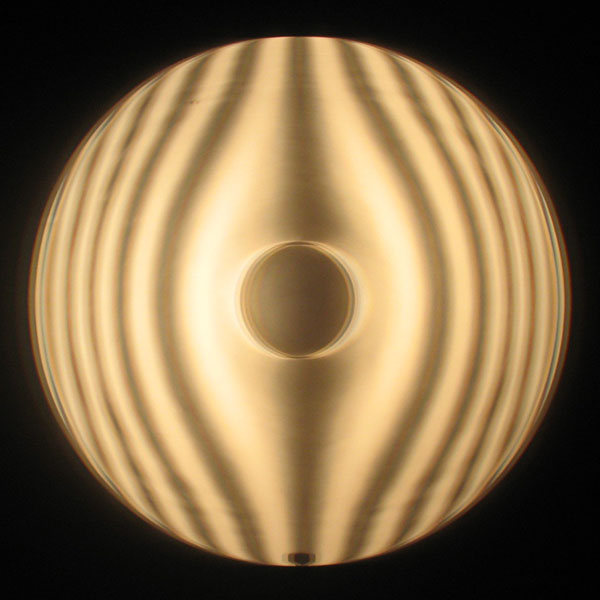
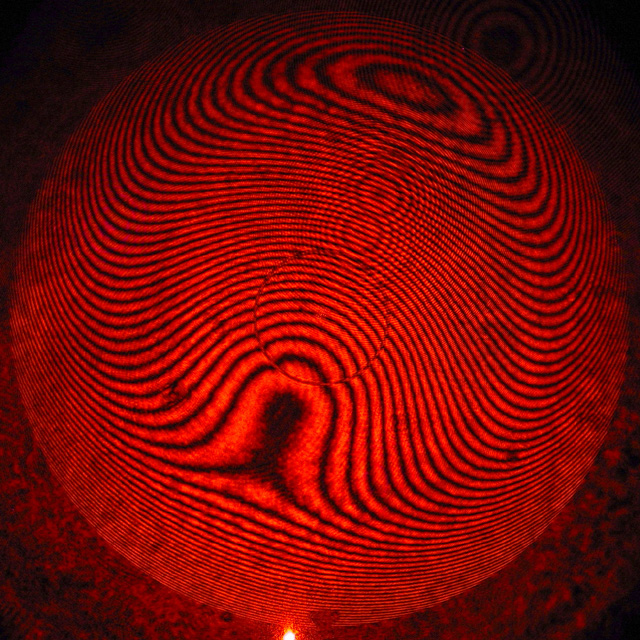
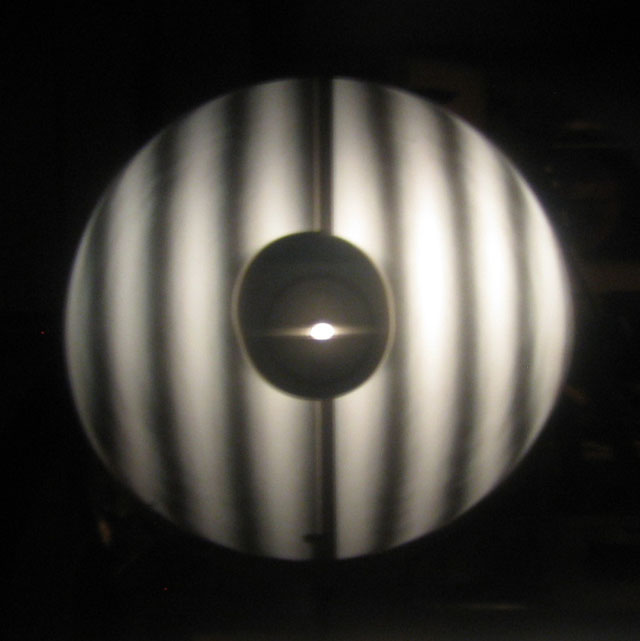
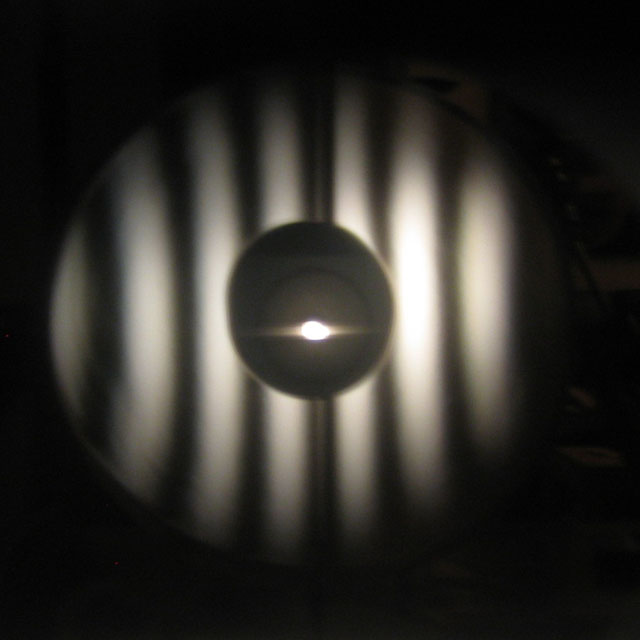
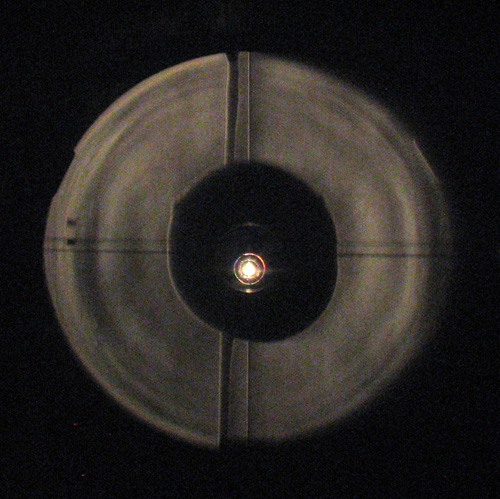
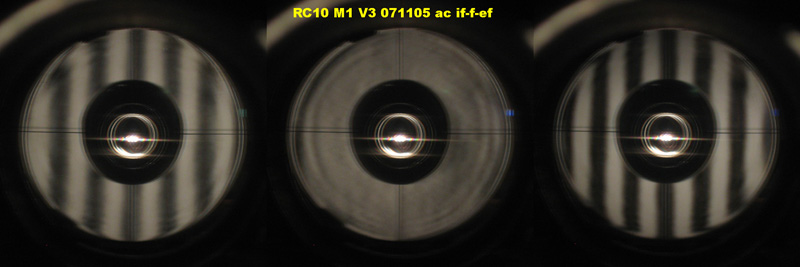
Why not using interferometric tests on the primary itself? The correction of the mirror is too strong! At F2.6 and CC=-1.172 the fringe photo is impossible to process and analyze.
Look at this image and you will understand that no one wants to trace all those fringes.
The LWT showed nice results on August 26 2007. That was close to 2 years after polishing began. Note that I don't care much about the depression in the center. The secondary D=100mm will obstruct it fully as shown in the second plot.
My plan at this stage was to remove the core from the primary, which is still plastered into the center and proceed with star testing in the scope and hopefully declare the project done. But to play it safe I wanted some more tests. At first I got a suggestion from a discussion forum to perform an autocollimation test of the primary against a flat. This is not truly yielding a null test but it removes a major portion of the correction and the Ronchi lines should become more straight and hopefully deviation easy to see.
The setup is very challenging. Using a 45degree mirror and observing from the side sounds easy. But the test is now done on a F2.6 beam and the alignment of the mirrors is very difficult without a precise optical bench. The kitchen table had to be sufficient for me.
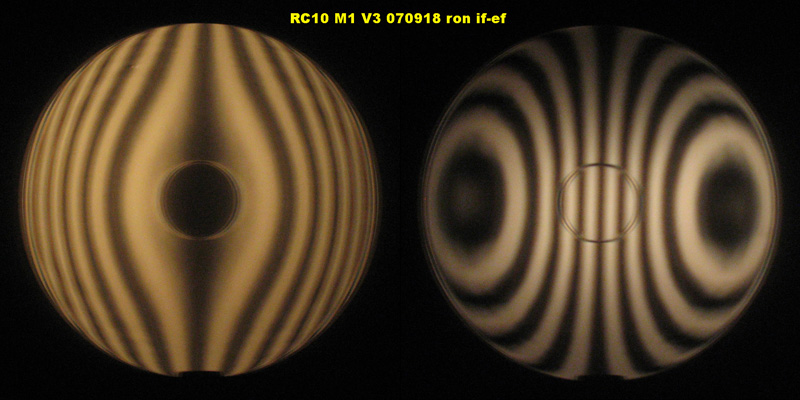
The Ronchi patterns in the test looked quite good. somewhat like a lightly corrected mirror.
Inside focus:
Outside focus:
Especially with the outside focus image the camera could not capture the fully angle of the mirror anymore. The overall shape looks good. Still there are more polishing streaks and artifacts in the outer zones.
However this is no test to perform in quick succession with polishing sessions. The setup is too difficult to collimate and removing and reinserting the mirror destroys the collimation.
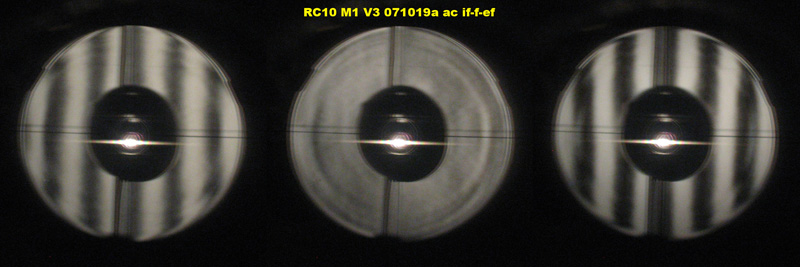
There was one more suggestion from a forum discussion. To use the same 45degree mirror and perform an autocollimation test in the entire system. That sounds like even more setup but then there is a solid mirror cell and when the tube is a truss tube there is easy access to install and remove the mirror. So a temporary tertiary mirror holder was quickly built and clamped into the truss tube. Same for an eyepiece holder. This way I can actually bolt the tube on my equatorial mount and do star tests.


After all was collimated the results cam in and were deeply disappointing.
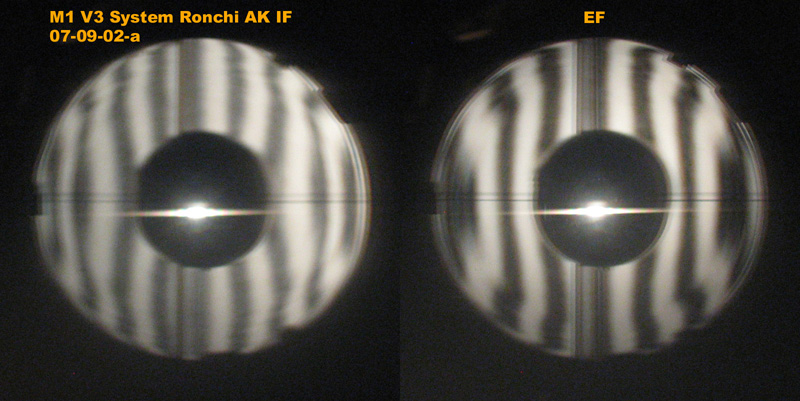
The artifacts in the outer zone are extremely bothersome when we finally observe in a true null-test. There is also undercorrection present. It is my suspicion that a portion of the undercorrection is in the secondary. I could fix it there but decided to fix it on the primary. The two will be used together anyway. The turned down edge is also in the hyperbolic convex secondary. Not much can be done here other than a refiguring. I will probably put a 5mm black cardboard ring on the primary to fix the edge in the end. For now I just ignore it.
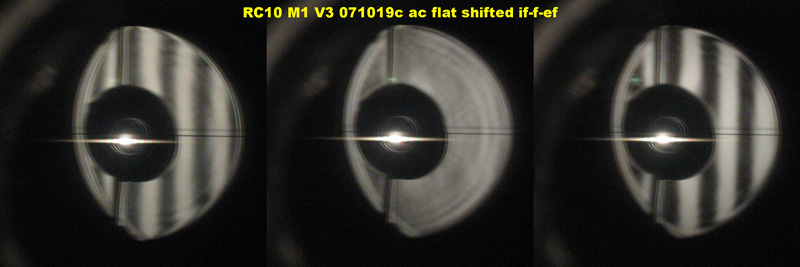
It seems that without a final test against a flat in autocollimation it is not possible to make a RC optics set that is halfway decent. That's disappointing. I could solve that problem for the 10" because I have a 11" flat. But this one was supposed to be a prototype for my 20" blank which I have still sitting in storage. And I don't have a flat to test that set when it will be done.
To finish the mirror I did more polishing using the 10cm and 5cm tools. All ToT on the turn table. The goal was to eliminate the roughness of the outer zone and correct the residual undercorrection and zones. Here are the intermediate steps. I added a shot with the Ronchi grating at center of curvature thus emulating a foucault shadowgram.

Polish with 5cm tool 10min. on R=102mm & 5min. on R=80mm,
5cm tool 15min. long center stroke to deepen correction.
I want to do something on the two elevated ring zones. Measuring their
locations in the Foucault images gives R=107mm and R=80mm.
15minutes on the 107mm zone and 10minutes on the 80mm zone with the
5cm tool.
The above did not work. Surprisingly it seems as if the low zones between
the two high zones even got deeper. It seems as if I was way
off away from the spot right on top of the zones. But measuring with
a ruler during the polish confirmed that the spot was right.
I'll abandon working purely on the zone for now. Next I will try to
add some correction with long radial strokes.
Maybe that helps evening out the intermediate zones as well.
20minutes 5cm tool center over center with 30% 60% 90% stroke length.
It seems the correction is a tiny bit better. The extra focal fringes
do no longer bulge outside as strongly.
Let's try to do something good on the edge. The broader edge is turned
up (let's call this the edge zone) and the extreme edge is down.
So I try to polish on the region about 10mm in from the edge.
20min with a 5cm tool.
Surprisingly not much happened on the edge zone.
So 10minutes more.
That again had not much effect. Next I will try 30minutes on the edge zone.
So here is 30min with the 5cm tool on the edge zone.

Especially in the intrafocal image the improvement of the edge zone
is visible. The big bulge in the upper left fringe is much better.
But we need more of this.
15minutes with the 5cm tool on the edge zone.
Again better.
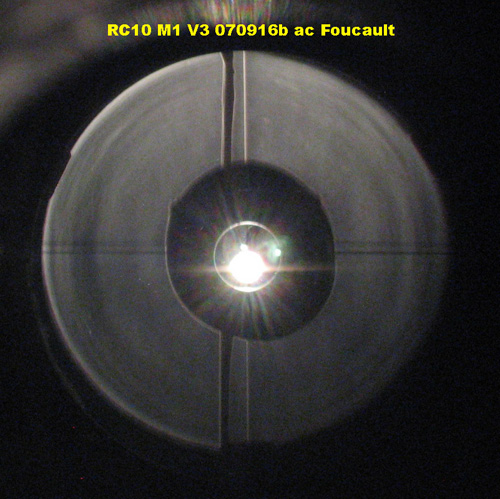
The Foucault images above are all made with a special position of the
Ronchi grating. I also wanted to see the true knife edge test.
So here it is. The image was much darker than in the test with the
grating. But the longer exposure of the camera brought it out nicely.
Maybe the interpretation from the grating-Foucault images above that
there were 2 two ring zone was wrong. There seems to be rather
a deepened zone at 80%. I shall work some more on the outer zone to
the edge.
I did 15 more minutes on the edge zone with the 5cm tool.
This is working in the right direction. Maybe 20-30minutes more on
the edge zone and the bends in the fringes should be gone.
20minutes more on the edge zone. The Ronchi fringes are straight now.
However a lot of grooves artifacts near the edge from local polishing.
Again I wanted a more clear Foucault image.
The two dots are felt pen marks on the top of the high ring zone near
he edge.
To bring down the ring zone and also even out the grooves I did 5min
polishing with the 5cm tool
radial strokes on the high zone.
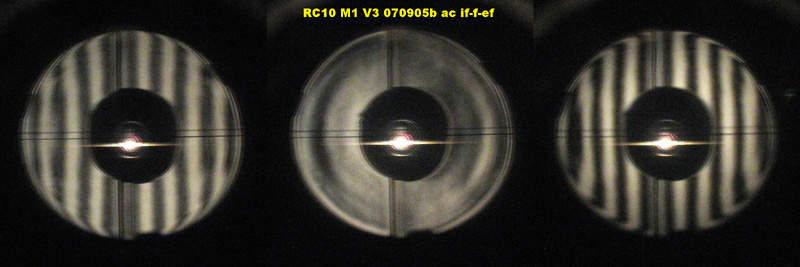
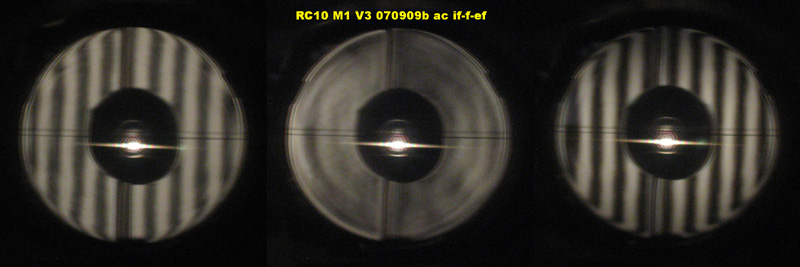
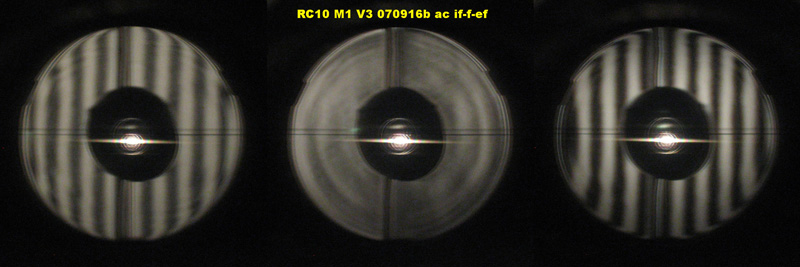
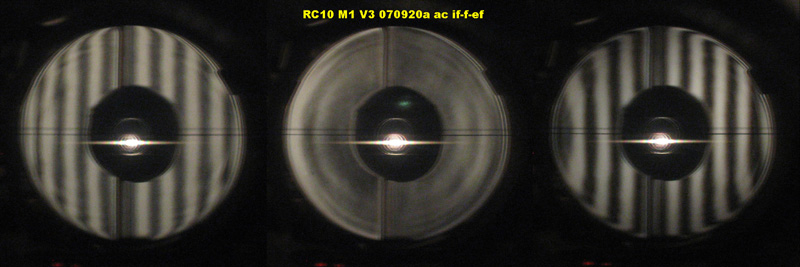
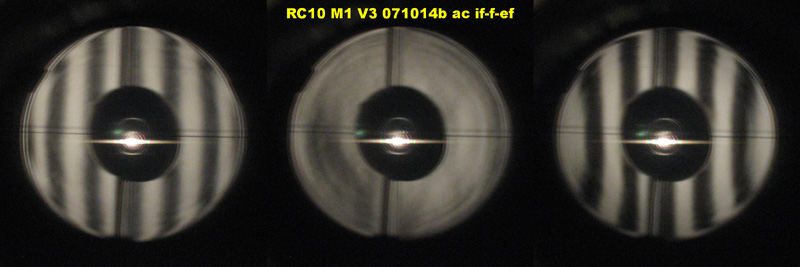
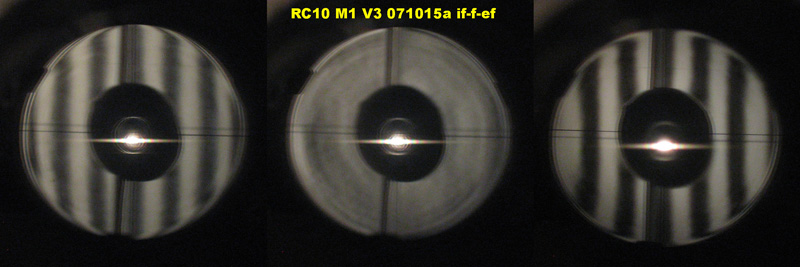
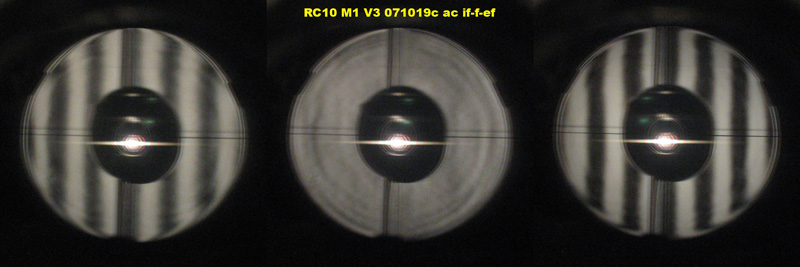
To see the effect of the work in autocollimation I did another Ronchi
test of the primary alone.
It is very difficult to see the zones here. Only the polishing artifacts
near the edge show.
To fix the ring zones I made a new lap. Its about 6cm x 2cm in size.
It will be pressed on the zone to be worked to have the best fit.
With the elliptical lap I tried 3minutes on the outer high zone at R=110mm.
Here is 5minutes more.
The improvement is becoming noticeable.
Another 2minutes more.
At this stage I stopped and will try a star test. There is a bit of
over correction coming up due to the work on the outer zone.
Maybe I will work on the 70-80% zone with the 10cm star lap. That would
be helping to smoothen the surface.
A more detailed shot wit less Ronchi fringes.
At this time I did a star test. The test shows over correction which
is in agreement with the Ronchi lines.
The defocused image is round and symmetric. This is good. It indicates
that there is no major astigmatism and no other asymmetric aberrations.
Before going after the over correction I will try to remove the 2 ring
zones at 110mm and 82mm.
Using the small elliptical tool about 15min. more on the outer and 10min.
on the inner high zone.

About 10min. and 8min. resp. more.
Next I'll try to remove the over correction with the 10cm starlap and strokes on the 70% to 80% zone.
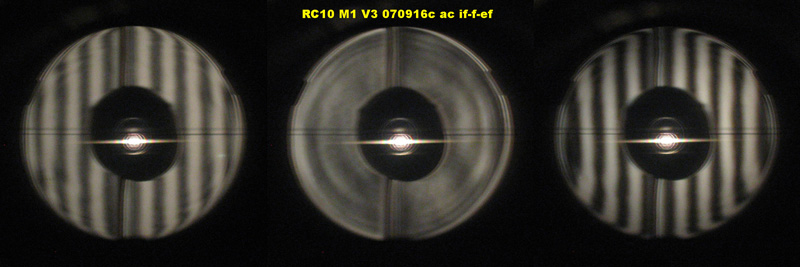
About 15min. with the 10cm tool on the 75% to 80% zone.
The lines have gotten straighter again. Also the zone near the edge
is a bit smoother than before. This is good progress.
5min. more.
The Ronchi lines are again better. The knife edge image in the center
seems to show almost a beginning of a depression zone near the secondary.
There is some left-right asymmetry but that could be collimation coma?
Next it s back to the small elliptical tool on the 90% zone to remove the high zone there. It is surprising how slow the small tools work.
10min. with the elliptical tool on the elevated outer zone. Not a lot
of progress.

Working 10min. on the outer zone with the 10cm tool with short radial
strokes. Followed by 10min. with the 5cm tool on 85% zone.
Next 13min. with the elliptical tool very close to the edge.
18min. with the elliptical tool on the zone very close to the edge.
The high zone is finally getting better.
9min. with the elliptical tool on the elevated zone. Again getting better.

8min. more on the high zone. It is now almost fully gone. I have stopped
here to do another test after 1day cool down.
Then I will do a star test.
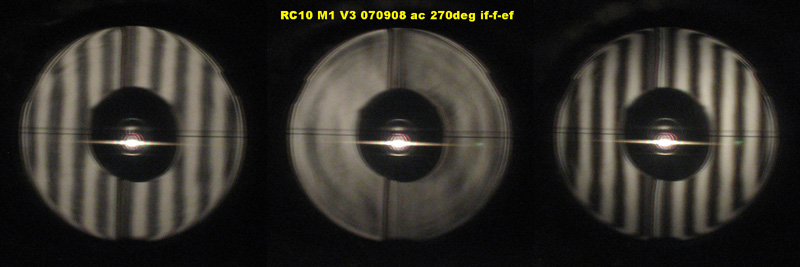
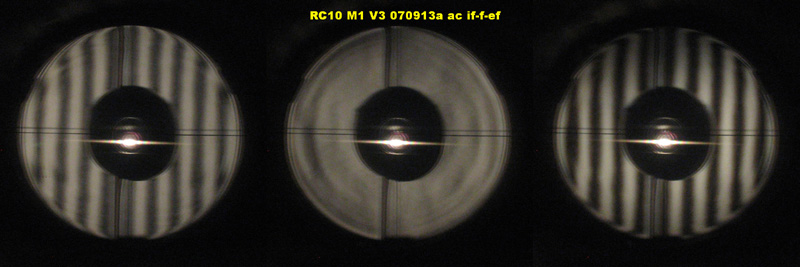
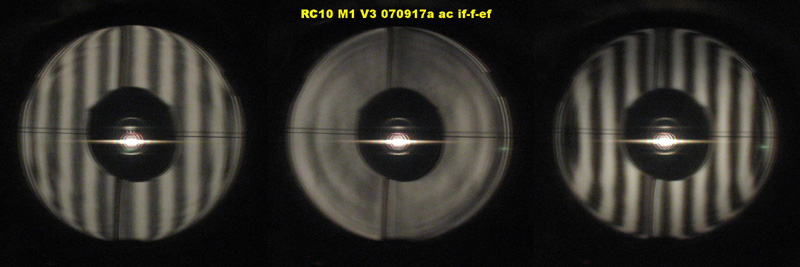
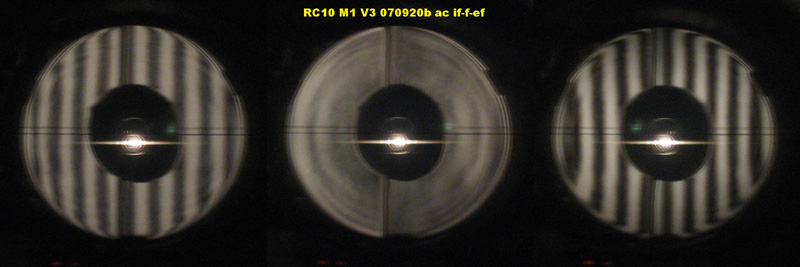
After 1 day of cool down I wanted to try a few more things. First I
rotated the primary 90 clockwise (in the photos).
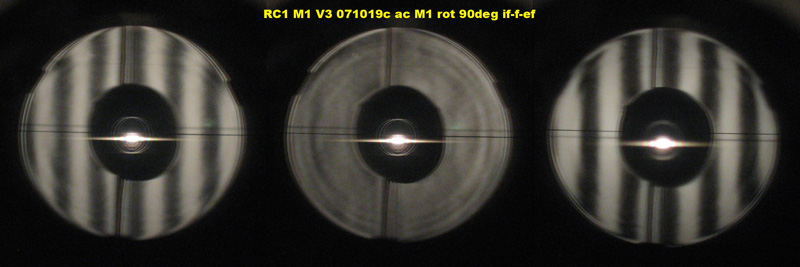
There is no significant change in the Ronchi pattern. That's good.
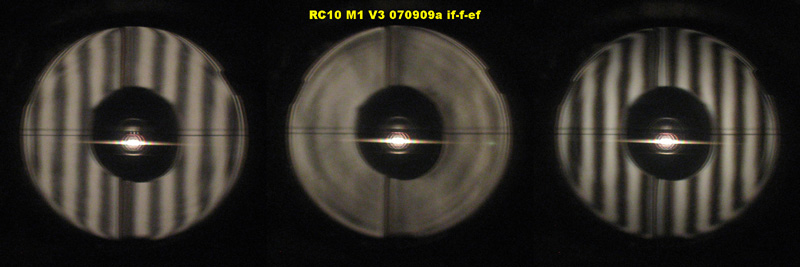
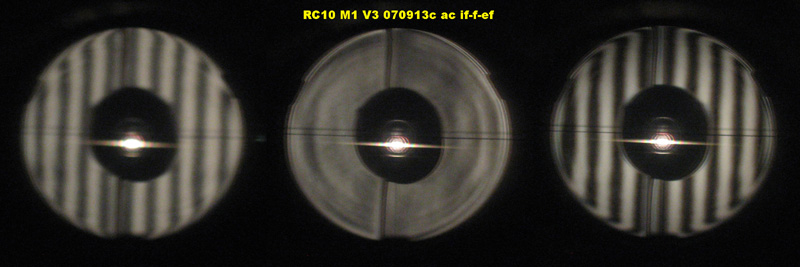
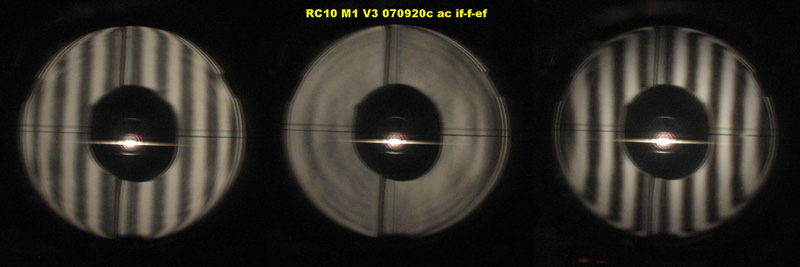
Next I turned the flat mirror on a slight angle this should introduce
coma.
It also should show if any zones are on the primary or secondary.
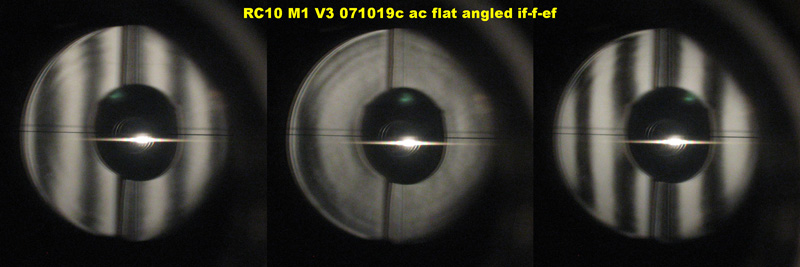
Result is pretty good. Deformation resembles coma as expected. The cut-off at right is from the limit of the eyepiece tube.
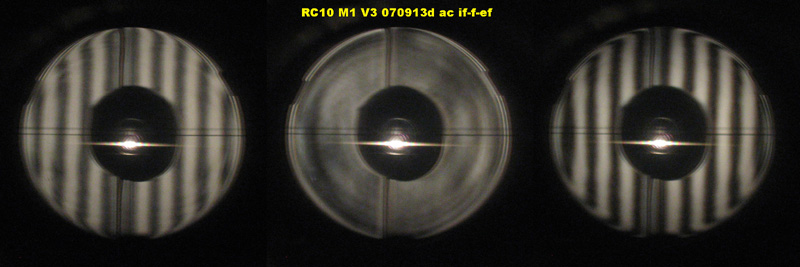
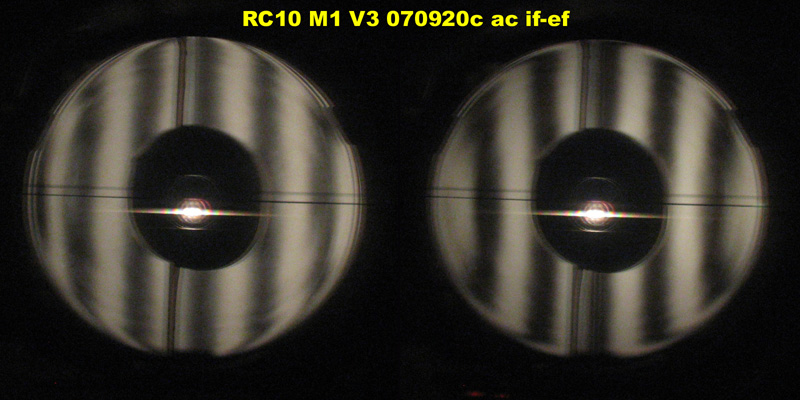
Next I wanted to test if the flat mirror used has introduced zones.
I shifted it sideways out of center. Any zones on the flat
would now show off center.
There are no major zones on the flat. The cut-off radius at left is
the edge of the flat.
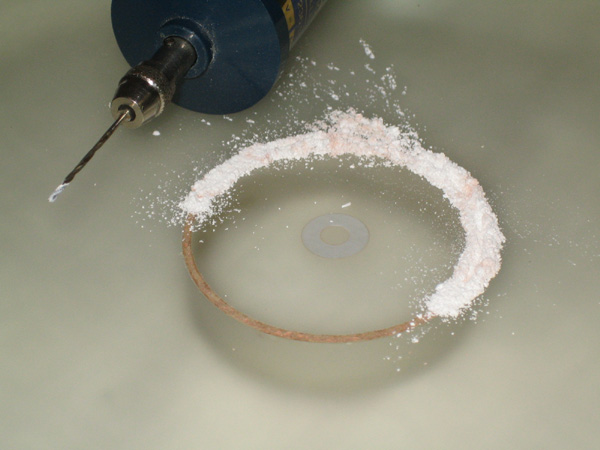
At this time I removed the core in the primary mirror. A little hand
drill did the job nicely
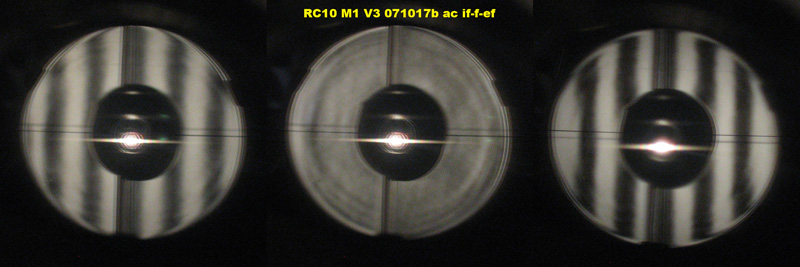
Then the mirror was mounted in the OTA for another Ronchi test. Some
zone showed up near the edge.
The strong zone seems to come from a misaligning overlap of changing
zones in the primary and secondary.
Recentering the primary by about 2mm changed the appearance. The zone
near the left edge is much smaller but still present.
Next I will try a star test.
Email : drgert1@yahoo.com
Back to my astronomy home page
Zurueck zur Astronomie Startseite